
Almost every carpenter, whether a seasoned professional or a curious beginner, remembers the same frustrating moment: standing in front of a half-finished shelf or a wobbly table leg, wondering why something that looked so simple in a video turned into a mess of crooked cuts and loose joints. The truth is, getting started with Wooden Work & Carpentry is not just about patience and creativity, it is about having the right tools in your hands before you even pick up a piece of timber. Without the proper equipment, even the most motivated beginner ends up wasting good material, damaging their workspace, or worse, getting hurt in the process. At MTS Interiors & Fitout, we have seen this struggle countless times with clients who wanted to try their hand at woodworking before eventually turning to professionals for a polished result. If you would rather skip the trial and error altogether, our team is just a call away at +971507410235, ready to guide you through your carpentry or fitout project from the very first cut to the final finish. But if you are determined to learn the craft yourself, this guide will walk you through exactly what you need, starting with the problem most beginners face and moving steadily toward the solution.
Why the Right Tools Matter in Carpentry
The biggest problem beginners run into is not a lack of skill, it is a lack of preparation. Someone picks up a random saw from a hardware store, grabs whatever measuring tape is lying around the house, and dives straight into a project without realizing that carpentry is fundamentally a craft of precision. A dull chisel that will not cut cleanly, a square that is slightly off from true ninety degrees, or a missing clamp at the wrong moment can quietly ruin hours of careful work. The solution starts with understanding that tools are not an afterthought in carpentry, they are the foundation of it. Investing in the right equipment from the beginning saves time and material that would otherwise be wasted on redone cuts and warped joints. It also improves the accuracy and overall finish of your work, turning shaky first attempts into something you can actually be proud of. Just as importantly, proper tools reduce the risk of injury, since many carpentry accidents happen when people try to force the wrong tool to do a job it was never designed for. Building good habits around tool selection early on carries forward into every project you take on later, making the entire learning curve smoother and far less frustrating.
Measuring and Marking Tools
Nothing derails a carpentry project faster than inaccurate measurements, and this is usually where beginners hit their first wall. A shelf that looks fine on paper suddenly does not fit the wall, or two pieces that were supposed to match end up slightly different in length. The problem almost always traces back to skipping proper measuring and marking tools in favor of guesswork. The solution is refreshingly simple: a good retractable tape measure, ideally in the five to eight meter range, becomes your most trusted companion for measuring wood, spaces, and layouts with confidence. A combination square helps you check ninety degree and forty five degree angles and keeps your marked lines honest and straight, which matters enormously once you start cutting. A carpenter’s pencil, with its flat shape that will not roll off a workbench, lets you mark clearly on rough or finished wood without constantly searching for a dropped pencil. For anyone getting into joinery, a marking gauge becomes essential because it lets you scribe consistent lines parallel to an edge, which is the difference between joints that fit snugly and ones that wobble. And a simple spirit level ensures that whatever you build, whether a shelf or a cabinet frame, actually sits level and square in the real world rather than just looking right in your imagination.

Cutting Tools
Once measurements are marked, the next problem beginners face is choosing the wrong saw for the job, which leads to jagged edges, wasted timber, and a lot of unnecessary frustration. The solution lies in understanding that different cuts call for different tools, and having a small but versatile collection makes all the difference.
Hand Tools
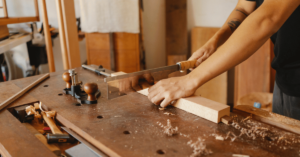
For everyday straight cuts through timber, a reliable hand saw remains one of the most underrated tools a beginner can own, offering control that power tools sometimes sacrifice for speed. When it comes to precise joinery work like tenons and dovetails, a tenon saw gives you the fine control needed to keep those joints tight and clean. For curved or detailed cuts that a straight saw simply cannot manage, a coping saw becomes the tool that opens up more creative design possibilities in your projects.
Power Tools
As projects grow larger and more ambitious, hand tools alone start to feel limiting, and this is where power tools solve the problem of time and consistency. A circular saw makes quick, accurate work of cutting large sheets of plywood or MDF, saving what would otherwise be an exhausting manual effort. A jigsaw takes over where straight cuts end, handling curves, cutouts, and intricate detail work with relative ease. For clean, angled cuts on trim, frames, and molding, a miter saw delivers a level of precision that is difficult to match by hand. And for anyone serious about building furniture, a table saw becomes a genuine workshop staple, allowing long, straight rip cuts to be repeated with consistency across an entire project.
Shaping and Smoothing Tools
Cutting the wood is only half the battle, and many beginners are surprised to find that their pieces still look rough and unfinished even after every cut is technically correct. The problem here is skipping the shaping and finishing stage entirely, assuming that a saw cut is the end of the process. The solution involves a set of tools designed specifically to refine what the saw has started. A set of chisels in various sizes allows you to carve joints, mortises, and detailed woodwork with a level of finesse that no power tool can replicate. A hand plane smooths and levels wood surfaces, quietly removing the small imperfections that would otherwise show up glaringly once a finish is applied. Rasps and files handle the shaping of edges and rounding of corners, giving furniture that comfortable, finished feel rather than sharp, unsanded edges. And finally, whether you choose sandpaper in various grits or invest in an orbital sander for larger projects, this final smoothing step is what separates amateur-looking furniture from something that looks genuinely professional once stained or painted.

Joining and Assembly Tools
Even perfectly cut and smoothed pieces of wood are still just separate pieces until they are joined together, and this is where many beginner projects fall apart, quite literally. Weak joints, loose screws, or glue applied without proper clamping pressure are common problems that lead to furniture that wobbles or fails within months. The solution lies in a dependable set of joining tools used correctly and in the right order. A classic claw hammer remains useful for nailing and occasional light demolition work, while a mallet is preferred alongside chisels because it allows controlled striking without damaging tool handles or splitting delicate wood. A good screwdriver set or a power drill driver speeds up fastening considerably, especially on larger projects where dozens of screws might be involved. Wood clamps in various sizes are, without exaggeration, one of the most overlooked essentials, holding pieces firmly together while glue cures or during the assembly of multiple parts, and skipping them is one of the most common mistakes beginners make. Wood glue itself provides a strong adhesive bond for joinery, often working best alongside screws or nails for extra structural strength. For those working on larger or more repetitive projects, a nail gun can be a worthwhile addition, significantly speeding up fastening tasks that would otherwise take considerable time by hand.
Power Drill and Driver
If there is one tool that beginners consistently underestimate until they own one, it is the cordless power drill driver. The problem many face early on is relying solely on manual screwdrivers, which slows down even simple projects and leads to stripped screws or uneven driving depth. The solution is investing early in a versatile cordless drill driver, which handles drilling pilot holes, driving screws, countersinking, and attaching hardware like hinges and handles, all with a single tool. Looking for one with adjustable torque settings and a good variety of drill bits for different materials ensures that this single investment covers the vast majority of tasks you will encounter across nearly every carpentry project you take on.
Safety Equipment
Perhaps the most overlooked problem in beginner carpentry is not a lack of skill or tools, but a lack of respect for the risks involved. Sharp chisels, flying wood chips, loud power saws, and fine sawdust particles are all part of the craft, and treating safety as optional is how injuries happen. The solution is straightforward and non-negotiable: proper protective equipment worn consistently, not just when it feels convenient. Safety glasses protect your eyes from dust and flying debris that can occur even during seemingly simple cuts. Ear protection becomes especially important once power saws or sanders are involved, since prolonged exposure to that noise level can cause lasting damage. A dust mask or respirator prevents the inhalation of fine sawdust, which accumulates in the lungs over time and poses a genuine long-term health risk. Sturdy work gloves protect your hands while handling rough or splintered wood, and proper work boots protect your feet from dropped tools or heavy materials. None of this equipment is expensive compared to the cost of an injury, and building the habit of wearing it from day one will serve you for the rest of your carpentry journey.

Workbench and Storage
Working on an unstable surface or digging through a cluttered pile of tools might seem like a minor inconvenience, but it is actually one of the quieter problems that slows down and even endangers beginner carpenters. Without a proper workspace, cuts drift off line, clamps have nothing solid to grip, and tools get damaged from being tossed around haphazardly. The solution is setting up a dedicated, stable workbench that gives you a flat, solid surface for cutting, assembling, and clamping every project you undertake. A vise mounted to that workbench secures your wood firmly in place while you work on it, freeing both hands for more precise cuts and shaping. And organizing your tools in a proper toolbox or on pegboard storage keeps everything easily accessible, saves valuable time during a project, and prevents the kind of accidental damage that happens when tools are left loose and unprotected.
Tips for Beginners in Wooden Work & Carpentry
Even with the right tools in hand, many beginners still struggle simply because they take on projects that are too ambitious too soon, and this is a problem worth addressing directly. The solution is to start with simple projects like shelves, small boxes, or picture frames, which allow core skills to be practiced without the pressure of a complicated build. It also helps enormously to invest in quality over quantity, since a handful of reliable tools will consistently outperform a large collection of cheap, unreliable ones that fail exactly when you need them most. Maintaining your tools by keeping blades sharp and surfaces clean is another habit that pays off quietly over time, improving both performance and longevity. Learning basic joinery techniques, such as butt joints, dado joints, and dovetails, elevates the quality of your work significantly and opens the door to more advanced projects down the line. And above all, prioritizing safety by never rushing a cut and always wearing the appropriate protective gear is the single habit that protects everything else you are building, both literally and in terms of your confidence as a carpenter.
Final Thoughts
Starting your journey in wooden work and carpentry does not require an overwhelming investment right from the start, it simply requires the right foundational tools, a fair amount of patience, and a genuine willingness to learn from early mistakes. As you progress from simple hand tools to more advanced power equipment, you will likely find that carpentry becomes something far more meaningful than a practical skill, it becomes a genuinely rewarding creative outlet that rewards care and attention with results you can actually touch and use.
At MTS Interiors & Fitout, we specialize in professional woodwork, custom carpentry, and complete interior fitout solutions, and we understand firsthand how much of a difference the right tools and expertise make in the final result. Whether you would like expert guidance on your own project, custom furniture built to your exact specifications, or a complete fitout handled from start to finish by skilled craftsmen, our team is ready to help turn your vision into reality. Feel free to reach out to us at +971507410235 to discuss your requirements, and let us help you build something you will be proud of for years to come.
Frequently Asked Questions
What are the most important tools for a beginner starting wooden work and carpentry?
For someone just starting out, the essentials come down to a reliable tape measure, a combination square, a carpenter’s pencil, a hand saw, a chisel set, sandpaper, a hammer, a few clamps, wood glue, and a cordless drill driver. These cover measuring, cutting, shaping, and joining, which are the four core stages of nearly every carpentry project, and they allow a beginner to complete simple builds without needing to invest in expensive power equipment right away.
Do I need power tools to start carpentry, or can I begin with hand tools only?
It is entirely possible to begin with hand tools only, and many experienced carpenters still recommend learning the fundamentals this way because it builds a stronger feel for the wood and more careful technique. Power tools like a circular saw, jigsaw, or drill driver simply speed things up and make repetitive tasks easier once you are ready to take on larger or more frequent projects.
How much should I expect to spend on a basic carpentry tool kit?
A basic beginner kit covering measuring, cutting, shaping, joining, and safety equipment can usually be put together affordably, especially if you prioritize quality over quantity and buy only what a specific project actually requires. It is generally better to purchase a smaller number of durable tools than a large set of low-cost ones that wear out or perform poorly.
What safety equipment is genuinely necessary for a home carpentry setup?
At minimum, safety glasses, a dust mask or respirator, ear protection for use with power tools, and sturdy work gloves should be considered non-negotiable. These items are inexpensive relative to the injuries and long-term health issues they help prevent, and building the habit of wearing them consistently from the very first project matters more than any single tool on this list.
Can I do carpentry work without a dedicated workbench?
While it is technically possible to work on a makeshift surface, a proper workbench with a vise makes an enormous difference in accuracy and safety, since it holds wood steady while cutting, shaping, or assembling. Without one, cuts tend to drift off line and clamping becomes far more difficult, which often leads to frustrating results for beginners.
What is the best first project for someone new to carpentry?
Simple, low-pressure projects such as a small shelf, a basic storage box, or a picture frame are ideal starting points because they allow you to practice measuring, cutting, and joining without the complexity of advanced joinery or large-scale assembly. Successfully completing a few of these builds real confidence before moving on to more ambitious furniture pieces.
When should I consider hiring a professional instead of doing carpentry myself?
If a project involves structural work, custom-fitted furniture, or a full interior fitout where precision and finish quality are critical, it is often more practical to bring in experienced professionals rather than risk costly mistakes on a DIY attempt. MTS Interiors & Fitout offers exactly this kind of expertise, and reaching out at +971507410235 is a straightforward way to get guidance or a full project handled by skilled craftsmen.